PhoTophe

BLOG

Photography has changed the way I see the world around me.

Through it I discover new things and rediscover old ones. Like my island, New Caledonia.

This blog is just me sharing my world through my photography.

Hope you enjoy.

Posts tagged sony
ROUND ABOUT A GOOD LIFE

This is the first time I’ve been out shooting since the end of lockdown. It felt good to be out concentrating and putting my total attention on one thing. I’ve wanted to photograph this roundabout for a long time now, well, since 2016 after I successfully captured the Ko We Kara roundabout for a local contest. I finally got my image but…

… the view point is all wrong. I think the better spot, and I can’t confirm this as it’s in a closed off area, would be on top of the hill located on the other side of the roundabout to the left. From that vantage point I’d have a view of the roundabout and the Belle Vie shopping mall behind it and not to the right, out of sight, like in this image. I will check that hill out again in hopes of finding a spot to reshoot this roundabout.

ABOUT THIS PLACE

Belle Vie roundabout is a major intersection in Noumea. From it you can head into the city, the southern suburbs, northern suburbs or head out of the Noumea altogether. To the left, just out of sight, is the Néobus depot, our new bus line that runs from Koutio to the City centre. To the right, just out of sight as well, is the Belle Vie shopping mall. In the mid-right of the roundabout is Magenta Discount and Magenta Bazar. Behind the trees and roundabout is Cheval Distribution, a pet and animal shop. Beyond the left and right of the image are petrol stations and cemeteries. Check out this blog post for a photo of the beautiful cemeteries we have here and, if your interested, a time-lapse over the same cemetery.

HOW I GOT THE IMAGE

This image was made from three photos. A main photo which included the foreground, most of the light trails and the mid-ground. The second photo was taken five minutes before the main photo and used to replace the sky. And the third photo was used to add light trails at the bottom left of the road and over the ghost cars. The blending was done in Photoshop and the editing in Lightroom.

Though I wanted a blue hour image, I start shooting at sunset and straight through blue hour. Glad I did because the photo I used for the sky was shot at the end of golden hour and the beginning of blue hour. Two out of the three images were 30 second exposures and I achieved that by using LEE Filters’ Little Stopper, a 6 stop neutral density filter. I needed the Little Stopper to get the light trails but as you can see in the photo, the cars were stopped long enough to be captured as ghosts. Love that effect though.

As I mentioned above, I think a better shot would be from the other side of the roundabout but I also think a higher perspective and wider angle lens would make for a better, more captivating image.

 
LOVERS BAY ROAD LOOKOUT

I’ve been talking about Baie des Tortues (Turtle Bay) on my last couple of posts and once or twice before that, but they’ve been detail photos, except for one that was taken from this exact spot but at night, so I thought I’d share a day image of the beach of Baie des Tortues (Turtle Bay).

The luck I had was that it was almost low tide when I took this shot, revealing the tunnel of the cliff, the Pierced Rock (la Roche Percée). Situated smack bang in the middle of the image with it’s own tiny beach in front of the entrance. At low tide you have access to the tunnel from the beach. The hole goes straight through the cliff to the other side where you join the other beach and peninsula, la Roche Percée, which you can see behind the cliff and to the right of the image. The tunnel is quite narrow and is part of the Sentier des Trois Baies (the Three Bay Trail) which includes Baie de la Roche Percée (Pierced Rock Bay), Baie des Tortues (Turtle Bay) and Baie des Amoureux (Lovers Bay). A beautiful walk if ever you have the time.

The beach behind the cliff is where I took the photo from my last post, Le Bourailais. This rock formation at the end of the cliff, known as le Bonhomme (the Man), is a landmark in New Caledonia with spiritual importance in Kanake culture. Hop over to my last post for more information on the Bonhomme de Bourail.

On the left side of the Roche Percée (Pierced Rock) cliff is an amazing 280° lookout point with a shrine dedicated to Notre Dame des Flots (Our Lady of the Waves), who watches over the ships. Magnificent views up there.

And of course, just below that is the beach of Baie des Tortues (Turtle Bay). Well known for it’s turtle nesting season in late January, early February. A beautiful little beach, very popular with the locals and tourists for picnicking. Not a bad spot for a romantic sunset either.

This shot was taken from the Route de la Baies des Amoureux (Lovers Bay Road). This small section of the road is part of the Sentier des Trois Baies (the Three Bay Trail), mentioned above. Two photos were taken to make this image. A long exposure of 10 seconds to smooth out the clouds and water, and a shorter 1/8th second exposure to capture the cliff side when the sun shone on it. It was cloudy and rain was on it’s way, as you can see from the top left of the image, but the sky opened long enough on the horizon to provided me with this beautiful light. I blended the 1/8th exposure on to the 10 second exposure in Photoshop and finished editing in Lightroom. Mainly just accentuating the cliff side, beach and water.

So there you go, the gorgeous Turtle Bay in Bourail, New Caledonia. This whole area is worth a visit if ever you’re round the corner.

 
LE BOURAILLAIS

An early morning rise in hopes of seeing baby turtles but no such luck. A beautiful, clear sky though gave me the opportunity to tryout and test my LEE Filters. One of the subjects was this guy, le Bonhomme, a well known Bouraillais. This post is a follow up of my last one where I spoke about Turtle Bay, located just behind this rock formation.

Le Bonhomme de Bourail (the Man of Bourail) is a famous monolithe of quartz shaped by the waves at high tide and under threat of collapsing by those same waves eroding it’s base. It is said to resemble the profile of a man’s head wearing a hat and with the water hole next to it, it has spiritual importance in Kanak culture. Few have met their demise here, the powerful suction of the water hole dragging them under, trapping them in the caves below, disappearing forever.

The Bonhomme is located between the Roche Percée peninsula (Pierced Rock) and Baie des Tortues (Turtle Bay) near the village of Bourail. Only a couple of hours drive north from Noumea, it is a popular place for tourists and locals alike, and especially surfers as it is one of the only surf beaches in New Caledonia.

To achieve the 2 second exposure on this photo I had to use my Little Stopper from LEE Filters. A neutral density filter that cuts down 6 stops of light. I also used their ND0.9 soft graduated neutral density filter to cut down 3 stops of light in the sky, giving me a balanced exposure with the foreground still in shadows. Though I focused before putting the filters on, I must have touched ever so slightly the focus ring as the Bonhomme is not as sharp as I would like. A silly mistake but one nonetheless. I had converted this image to black & white but I prefer the contrast of the golden glow on the rock formation to the cooler water and sky. It’s more pleasant to the eye and the reason why I photographed it in the first place. Glad I captured a bit of reflection on the bottom of the image too as it helps to lead the viewer’s eye to the monolithe.

Anyway, that’s it for me my friends, hope to see you on the next post. À bientôt.

 
BLUE TURTLES

Though I don’t take enough of them, I do love long exposures. The effect it has on the elements, the mood it gives a scene, how it can transform the ordinary into the surreal and the way it shows time differently. Here is an example of what I’m talking about.

This is the north end of Baie des Tortues (Turtle Bay) located in Bourail next to La Roche Percée (Pierced Rock). Only a two hour drive from Noumea, the Capital of New Caledonia. This area is very popular with tourists and locals and renowned for two landmarks, the Roche Percée (Pierced Rock) and the Bonhomme (the Man). The Roche Percée is a peninsula and a detached suburb of Bourail, known as one of the only surf spots in New Caledonia. And, it is also a cliff with a hole that runs through it from the Roche Percée beach to Baie des Tortues beach, accessible only at low tides. The Bonhomme is a huge monolith of hard quartz sculpted by the waves to resemble a man’s head wearing a hat. Those same waves render it vulnerable as they erode the base threatening it’s collapse. The waves have already eroded a good part of the cliff mentioned above. A yearly phenomenon also occurs on these same two beaches in late January, early February… turtle nesting season.

The nesting season was one of the reasons we were up here and photography was another of those reasons. We’d decided to go for a stroll along the beach of Turtle Bay and maybe capture a sunset. No such luck with that but I did come home with this blue hour photograph. The two minute long exposure turned this frantic scene of choppy waters and threatening clouds into a calm, tranquil, minimalist image. Even the colours are minimal with their tones of blue and the faint touch of orange/red in the sky. The two minute exposure wouldn’t have been possible without the Little Stopper, a 6 stop neutral density filter, from LEE Filters. Without it, only a two second exposure was possible and wouldn’t have given me that misty water and silky smooth clouds. Except for a lot of cleaning up, there was very little editing done. I did edit a black and white version but I felt the contrast was too harsh and thus stuck with the subtler blue tone version.

I’ll edit a photo of the Bonhomme I took about a week before this one and share it on the next blog post. Hope you’ll check it out. Ciao for now.

 
ONE DAY

Nouville, Noumea

Having a new-born in your life leaves little time to go out shooting. Very busy figuring out a lot of things from the baby’s needs to medical visits, everyday chores and who does what, when. Organisation and finding a routine is key though. Apart from eating and sleeping, babies don’t do much else but a small shifted of just 30 minutes in their routine can make or break your day… and night. Ozalee started to have a fairly steady night routine about five or six days ago. Let’s hope it lasts.

So I may not have a lot of time to go out and about shooting sunrises or sunsets, I do have the time to photograph my baby girl. Videos are important too. They show how they move, react to things, their changing facial expressions, their laughter, the sounds they make and many more things that a photograph can not portray. Don’t worry, I won’t bombard you with baby photos. I have a Lightroom catalogue full of photos I want to share with you.

This photo was taken the day after her birth and at approximately the same time too. She’s one day old here. I took a few shots from different angles and this was the best of the lot. The photo was taken with the Sony a7 III with the Tamron 28-75 ƒ2.8 lens, zoomed all the way in at 75 mm. I went with an aperture of ƒ/4 to get enough depth of field to get all her eye in focus. A shutter speed of 1/125th second was plenty as she wasn’t moving. The ISO was too high for my liking but I had no choice with just a small light illuminating the room. I was pleasantly surprised though to see the photo void of noise. The light, shadows, tones and subject made for a beautiful black & white conversion and very little edit was needed. I’m going to get this one printed for sure.

Well thank everyone for you patience and putting up with my baby photos. Hope to see you in a few days for an old photo dating back to 2013.

 
Sony a7 III body only.jpg

SONY a7 III

24MP full-frame mirrorless camera from Sony’s Alpha series. Also does 4K video. A great all-round camera.

Tamron E 28-75mm ƒ/2.8 Di III RXD.jpg

TAMRON STANDARD ZOOM LENS

Tamron E 28-75 mm ƒ/2.8 Di III RXD is a standard zoom lens for E-mount camera. A perfect match for the Sony a7 III.

SONY NP-FZ100 battery.jpg

SONY BATTERIES

Sony’s NP-FZ100 lithium-ion from it’s Z series are reliable and long lasting.

SANDISK Extreme Pro 128GB SDXC 95MB:s.jpg

SANDISK EXTREME PRO

SanDisk Extreme Pro SDXC memory cards are fast and reliable. With 128 GB you never run out of storage for photos or videos. It’s what I choose to use.

Giotto Lens Cleaning Kit.jpg

GIOTTO CLEANING KIT

This lens cleaning kit from Giotto includes a Rocket blower, a soft dust brush, pointed/rounded cotton buds, a microfibre cloth and cleaning solution. I also use it to clean the outside of my camera.

UES Full Frame Sensor Swabs.jpg

UES CLEANING SWABS

Cleaning swabs by UES for full-frame sensor cameras. DSLR or mirrorless. I clean my camera sensor at least once a year, more depending on where I’ve been.

 
OZALEE

Noumea

I have the immense pleasure in announcing to you the birth of our daughter, Ozalee, born on the 3rd May 2020 at 4:55 p.m.

I apologies for the lack of content lately but as you now know, my attention was elsewhere. Mother and baby are doing great and arrived home from the clinic yesterday. The beginning of a new chapter in my life and I’m very excited about it. Anyway, I won’t go all gaga on you, suffice to say I’m on cloud 9.

I’m absolutely stoked about this portrait of Ozalee. Things happen quickly at birth and the baby constantly moves. Taken only an hour and a half after birth, I was praying I had gotten the shot. There isn’t a lot of light in the delivery room so I used a high ISO (3200). Aperture was wide open (ƒ/2.8) to let in as much light as possible and shutter speed (1/160th) at least twice that of my focal length (64 mm) to make sure I freeze the moment. I used AF-C (continuous auto-focus) to nail the focus every time. OK, I missed a few times but it worked most of the time. And I got the shots because I used Hi-speed shooting to capture that crucial moment.

I can’t tell you how priceless these photos are. Unlike studio shoots where you have the time to stimulate and grab the baby’s attention to capture expressions and poses, in the delivery room you don’t have the luxury of time. You have to take advantage of every opportunity to snap as many photos as possible. There’s no second chance here. Studio photos are taken a week or more after the birth… you can do them any time. They’re beautiful and amazing too and a must for anyone who can afford to do them. But a photo of your baby seconds, minutes, hours after birth are memories you’ll cherish all your life.

Enough said, I hope everyone’s staying safe and are still using the protective measures. This thing isn’t over yet. Stay safe and cherish the moments with your loved ones.


SONY a7 III

Sony a7 III (body only) a full-frame, mirrorless camera. A great all-round camera.

TAMRON STANDARD ZOOM LENS

Tamron E 28-75 mm ƒ/2.8 Di III RXD standard zoom lens for E-mount cameras.

SONY Z SERIES BATTERY

Sony NP-FZ100 lithium-ion z series battery.

SANDISK MEMORY CARD

SanDisk Extreme Pro 128 GB SDXC memory card. Fast and reliable.

GIOTTO CLEANING KIT

Giotto cleaning kit for lenses includes a rocket blower, a dust brush, pointed and rounded tip cotton buds, a microfibre cloth and a cleaning solution.

UES CLEANING SWABS

UES cleaning swabs for full-frame sensors.

 
THE SOUTHERN WAY

La Roche Percée, Bourail

Second week of our slow exit from confinement and people are starting to forget to implement the protective measures that are still very important.

Back in October I wrote a blog post about getting a new camera setup and trying astro-photography. This is one of those photos I captured. I’ve looked at this photos a few times but it was only on my last edit check that I realised I had captured, not only, the Milky Way but the Southern Cross as well. And that’s because of the research I did for a recent blog post, Celestial Confinement, where I learned to use Alpha Centauri AB and the Southern Cross to find the South Celestial Pole.

In January of last year, I spent a few days with my friend, who was minding a house here, at La Roche Percée. Located on the coast of Bourail which is about a two hour drive north of Noumea. It’s a very popular area with one of New Caledonia’s renowned landmark, Le Bonhomme. Plenty of accommodation, from camping to four star hotel, around the area. Lots to do as well.

It was turtle nesting season and I went out in hopes of seeing baby turtles. No such luck but since there was a fairly clear sky filled with stars, I decided to test my new camera setup (the Sony A7 III with the Tamron E 28-75mm ƒ/2.8 Di III RXD lens) and my hand at capturing the night sky. I admit, I could’ve taken my time to find a better foreground interest but, in my defence, I just wanted to see how well I could capture the stars with my setup.

I hadn’t planned this shot at all. It was a spur of the moment thing when I saw the Milky Way above me. So I set my tripod right where I was and took several exposures with different settings. I noticed the longest exposure I could take without creating star trails was 15 seconds with an ISO of 6400. A longer exposure would create oval shaped stars, especially in the corners, the beginning of star trails. This shot is a 10 second exposure with ISO at a whopping 12,800. Not necessary at all but I wanted to see the amount of noise I’d get with a long exposure. Very little noticeable noise in the sky though very noticeable in the foreground. For best results, a second, very long exposure would’ve been needed for a cleaner and brighter foreground.

I looked at a lot of tutorials on how to edit the Milky Way and it took me a long time and many trials before finding my own editing process and achieve something I was happy with. No fancy Photoshop edit, just some Lightroom brush work.

It was once the photo was ready for sharing that I recognised the two bright stars of Alpha Centauri AB at the bottom of the Milky Way, and the Southern Cross just above it. I was so stoked. This, of course, was thanks to research I did a few weeks ago for my blog post Celestial Confinement. I have to say, this photo means a lot more to me now.

I got a little too excited and provided the illustrated photo to the right for those who are not into astrology. I hope you find this fascinating though or, at least, interesting. Especially for you amateurs and enthusiasts out there, who are getting into this kind of photography. Taking beautiful photos is great but having knowleadge what you’re I think it gives more meaning to your photos. Let me know what you think over on Twitter at @Hervouet.

Now please everyone, whether you’re still in auto-confinement or not, make sure you’re implementing the protective measures of washing hands, social distancing, no touching, coughing and sneezing in your elbow and when possible wear a mask and gloves. Stay safe.


SONY a7 III

A full-frame, mirrorless DSLR from the Sony Alpha series cameras.

TAMRON STANDARD ZOOM LENS

Tamron E 28-75 mm ƒ/2.8 Di III RXD standard zoom lens for E-mount cameras.

VANGUARD TRIPOD

Vanguard VEO 235AB 5 section tripod with TBH-50 ball head.

L-BRACKET

L-bracket / plate for Sony Alpha series cameras.

SANDISK EXTREME PRO

128GB Extreme Pro SDXC memory card from SanDisk.

LETMY HEADLAMP

LED headlamp from Letmy with white and red light.

 
CELESTIAL CONFINEMENT

6ème Kilomètre, Noumea

Day 20 of auto-confinement announces an extra week of… confinement.

My failure to capture the Super-moon this week pushed me to try my hand at capturing the South Celestial Pole. Though the conditions weren’t the best (the full moon), the opportunity was, with clear skies and the terrace facing south/west. I don’t think it’s too bad for my first attempt, what do you think?

The South Celestial Pole is difficult to explain. It’s an imaginary point in the sky that shows the rotational axis of the Earth. It’s a point in the sky where stars seem to rotate in a circle but in fact it’s the Earth rotating. The South Celestial Pole is only visible from the Southern Hemisphere and the North Celestial Pole only from the Northern Hemisphere.

The idea was to capture the South Celestial Pole through multiple long exposures. Then stack them using StarStax (or any other software that can do the same job) to produce a single image. I would need a few hundred photos for the effect wanted so, apart from a camera and lens, I would need a tripod and an intervalometer. Even though I have a wired remote shutter release, I used the Sony a7 III’s in-body intervalometer for this project. I ended up shooting for about five and half hours but that’s because I miscalculated the total duration time of the project. I based my calculations just on the intervalometer which gave me an hour and half total duration time (1800 exposures x 3 second intervals or pauses between exposures). My mistake was not realising that the intervalometer wasn’t taking into consideration the exposure time of 30 seconds for each of the 1800 exposures, which gives me fifteen hours of just exposure time. Yep, off by that much. I used the PhotoPills app to find the South Celestial Pole but unfortunately, the calibration was slightly off and thus the pole isn’t centred above the flame, as I’d intended. No matter, now I know and will give it a go another time.

I started shooting around 11:30 pm and stopped round 5 am, which gave me about 600 photos. I didn’t use all of them as a few in the beginning and end had too many clouds and a handful in the middle had moved when I stepped out onto the terrace at 1 am thinking it was all finished. It’s also when I thought about why my calculation was off. I ended up using 535 photos for this image. I edited the first one in Lightroom then synched the edit to all the images. I exported them to a folder on my desktop then imported them into the StarStax application. Oh, I forgot to mention that I took a dark frame at the end of the shoot. That is, the exact same exposure as the other 600 but with the lens cap on, to capture a dark image. I also imported this frame into StarStax. It helps with noise and other stuff. Astro-photographers say you should also take bias frames but I didn’t bother. I mean, I almost forgot about the dark frame let alone the bias ones. Anyway, once the 535 photos and dark frame imported, I just clicked on process and left the application do it’s thing. The stacked image shown wasn’t great, to tell you the truth. So I reprocessed the 535 photos multiple times with different settings/configurations but the stacked image was never… it never seemed quite finished. It wasn’t the results I was hoping for. Until I decided to go ahead and export one of the stacked images and saw it was just fine, great even. The application must do a final rendering as it exports the final stacked image because the difference is day and night. Happy with the image, I brought it back into Lightroom for a final edit then into Photoshop for a bit of cleaning and added the flame on the torch. I couldn’t let the torch burn all night so decided to photoshop it in instead. Not the best work but it does the trick, no?

I hope I’ve explained myself clearly enough for you to understand how I came away with this image. If not, let me give you a simpler explanation. I took lots of photos of the exact same scene/picture. Now the foreground (terrace, buildings and trees) don’t move but the stars do, they rotate in the sky. So once I stacked all the photos on top of each other, because the foreground (terrace, buildings and trees) hasn’t moved, it stays exactly the same in the final image. The stars though have moved/rotated during the night, so once stacked, it shows the path they’ve travelled during the night, hence the circles in the final image.

I hope that has helped a little and I hope you’ve enjoyed this post. Talk to you soon and don’t forget, if your area is in auto-confinement, please stay home and if not or you’re working, please protect yourself and others by implementing the protective measures. Stay safe.


SONY a7 III

24 MP full-frame, mirrorless camera (body only)

TAMRON LENS

E-mount 28-75 mm ƒ/2.8 Di III RXD standard zoom lens

VANGUARD TRIPOD

Vanguard VEO 235AB tripod with TBH-50 ball head

SANDISK MEMORY CARD

SanDisk Extreme Pro 128 GB SDXC memory card

WIRED SHUTTER RELEASE

JJC wired remote timer/shutter release for Sony Alpha series cameras

L-PLATE/BRACKET

quick release arca-swiss L-plate/bracket for Sony Alpha series cameras

 
TIEBAGHI VILLAGE

Koumac, Tiebaghi Village

With the corona virus (Covid-19) here in New Caledonia since last week and with auto-confinement in place since midnight monday, photo outings are no more. I’m lucky I have a stock of images to get through and share with you. This set is one of them. A trip to Koumac, in June last year, with the family brought back memories to my mum of her childhood in Tiebaghi Village. Her father, my grandfather, worked in Human Resources on the mine and, apparently, was well liked by everyone. I remember my grandmother telling me that he’d never say no to anyone but told them he’d see what he could do. Anyway, I deviated a little.

The above panorama shows the village of Tiebaghi. From the social club on the left to the bakery on the right. In-between are a couple of grocery stores, a chapel, a playground, an engine dock, a few houses farther down, etc and behind me, from where I took this photo, there’s the clinic. Plenty to see and visit and if you’re interested and there’s a three hour guided tour that you can book with a lot of history knowledge and humour. Check out the current dates of the visits through the Province Nord website. It’s a visit worth doing if ever you have the chance. It’s kids friendly and you don’t need a four wheel drive to get there, we were in a minivan.

The Tiebaghi plateau opened in 1877 when Chromite Ore was discovered and it became the largest Chromium provider in the world in 1941. It also produced Nickel during World War II. The mine closed for the first time in 1962 and reopened in 1982 before definitely shutting down in 1990.

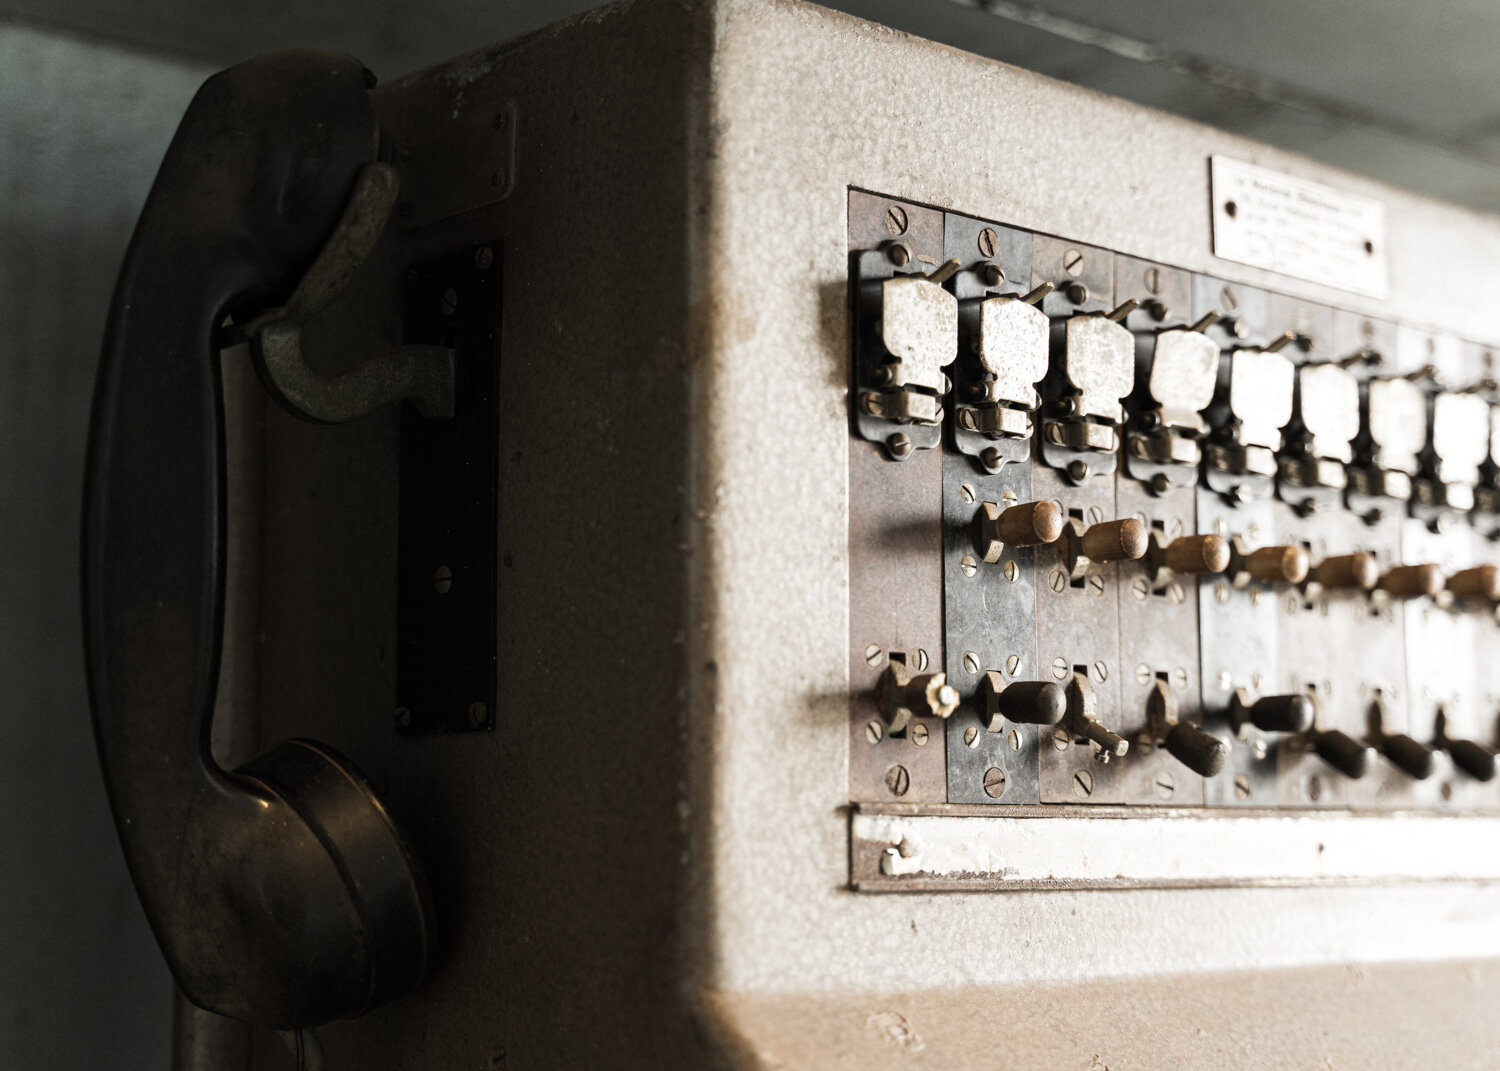
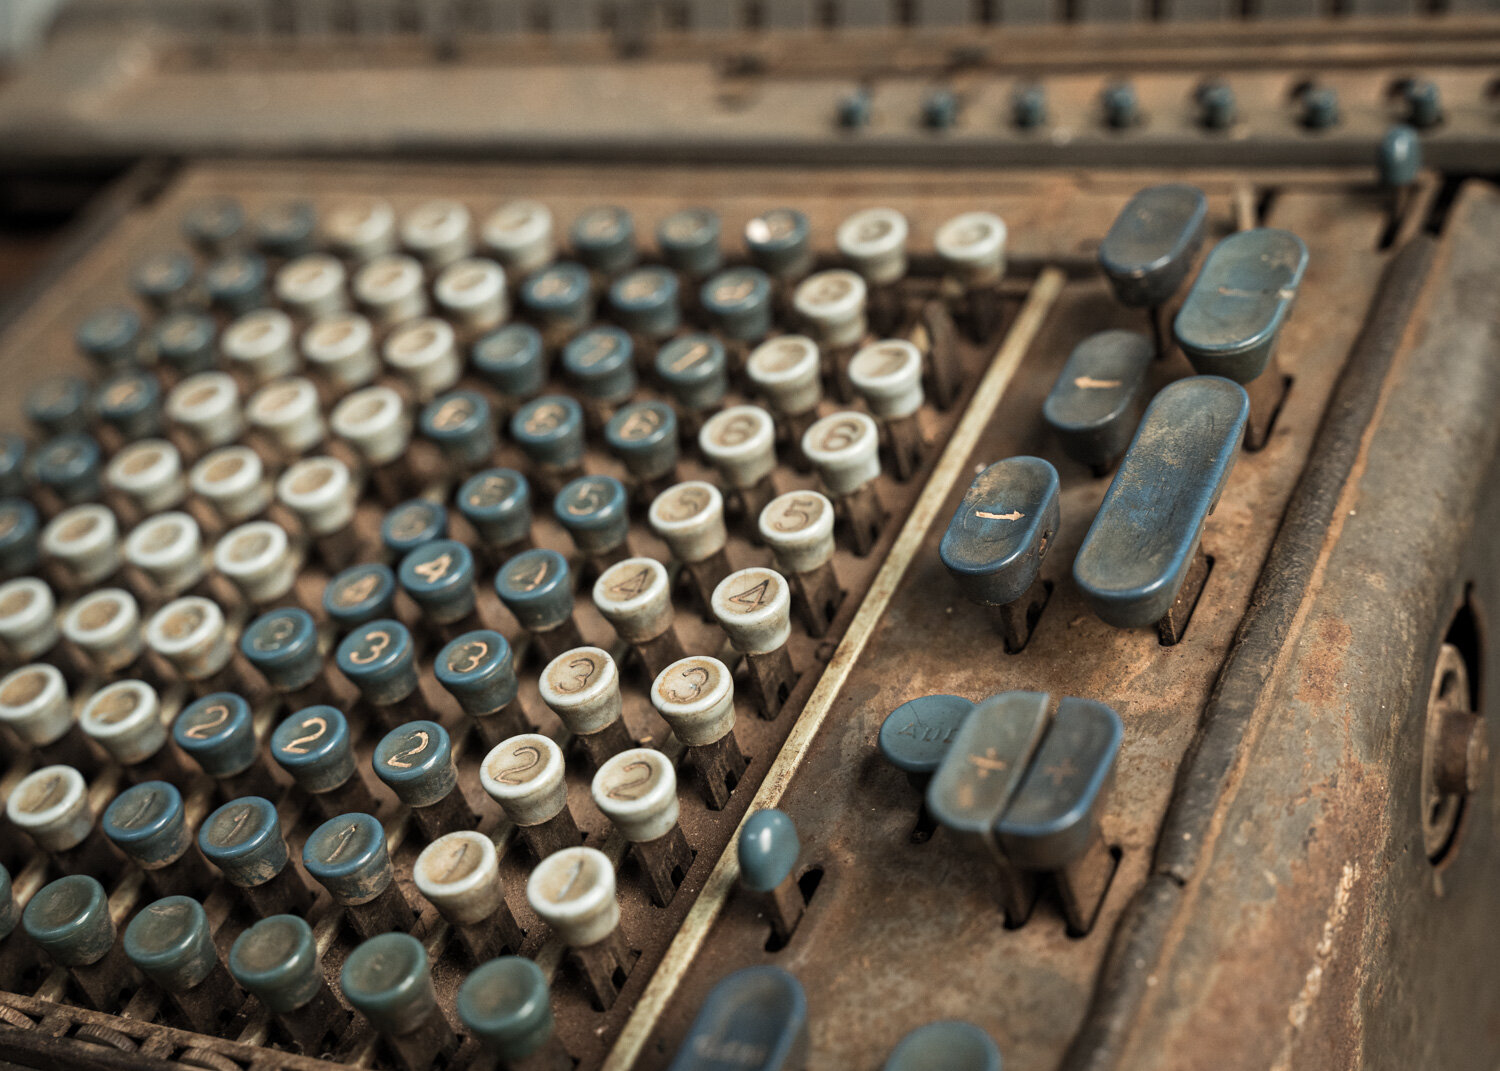
All the instruments and objects photographed above, were found in the clinic. A power box for dentistry, x-ray command box, a telecom switch, really old suitcases, a remote control box for… something, a crank phone, a couple of calculators and another instrument I have no idea what it was used for. Very interesting stuff and there were dozens more things I could’ve photographed but I just wanted to get a few detail shots of a handful of things. The clinic is situated above the village and has a fantastic view as you can see from the panorama photo which was taken from there.

Just a couple of photos from the social club. It’s just a empty hall and there wasn’t much in it apart from this beautiful film projector. Spectacular north-eastern views as well from the club. There are a lot of photographs of past events in the hall. It’s great to see what life was like back then.

This wasn’t my first time visiting the Tiebaghi and because of that I didn’t take a lot of photos of the exterior even though there are very interesting things to photograph. This old, rusted truck, for example, with the company name on the passenger door. There’s also a small cargo rail and cable car for the minerals and whatnot. The engine dock is quite interesting as well with it’s massive equipments.

One thing we HAD to do was find and visit the house my mum grew up in. We found it, isolated on a hill with magnificent views of the valley and mountain range. Still standing and in good condition, apart from the roof, these houses were built to last. Evidence after a few tropical depressions and cyclones. It’s difficult to imaging what life was like on Tiebaghi Village but from what my grandmother told me, though hard, camaraderie was high amongst this mining community.

I think the best time to visit Tebaghi Village would be in October during heritage month. Over a weekend they have guided visits of the village and botanical path, artisanal stands and expositions and reopen the old bakery to make and explain how bread was made in the old days. I plan on making this visit this year, if all goes well.


SONY a7 III

full-frame, mirrorless camera (body only)

TAMRON E 28-75mm ƒ/2.8 Di III RXD

standard zoom, E-mount lens

SANDISK EXTREME PRO CARD

128GB SDXC memory card

GIOTTO CLEANING KIT

lens cleaning kit with blower, brush, microfibre cloth and solution

WANDRD PRVKE

31 lt. travel backpack

WANDRD INSERT

medium size camera insert for the WANDRD PRVKE backpack

 
THE ISLES OF ATCHU

Kuto, Isle of Pines

Nearing sunset, I decided to head down to the beach to find a potential photo. Hoping for some colour in the sky even though the beach faces east. No colours or dramatic skies but I came away with this photo as I was trying out my filters before the sun set.

The beach at Atchu Camping is small, about 50 metres long, and has a lot of seaweed and algae on it’s powdery white sand. Though secluded and isolated, it’s only seconds away for users of the campsite. We were there for five days and rarely saw someone on the beach let alone in the water. I have to admit, we didn’t swim there either but did stroll along a few times. The beach faces east, great for sunrise or front lit scenes like this one. And the two isles in the distance just add to this paradise scene. Isle Adventure is largest of the two and spans from the right to behind Isle Duroc, which is small, round and in front of it’s big brother. I’m on the far north end of the beach here and like the southern end, it’s dead coral. You can only get here by sea or through Atchu Camping.

I got here half hour before sunset and stayed almost half hour afterward. This was the best shot I came away with. It’s actually a blend of two images to get sharpness throughout the image. One focused on the foreground and the other on the islands in the background. To get the long exposure of 15 seconds, I had to use my Little Stopper (6-stop filter) because it’s always windy here so the water is a little choppy. I also added a 3-stop ND soft grad. filter to control the bright sky and a polariser filter to cut the glare on the water’s surface. It also adds a bit of saturation to the water and sky. Editing was done in Lightroom except for the blending of the two images which was done in Photoshop. As I’ve mentioned in previous posts, the Calibration panel in Lightroom can do wonders to images when used right. There’s a small learning curve but once you get it, you’ll use it often. Especially on landscapes images. Try it out.


SONY a7 III

full-frame mirrorless camera (body only)

TAMRON E 28-75mm ƒ/2.8 Di III RXD

standard zoom, E-mount lens

VANGUARD TRIPOD

VEO 235AB Tripod with TBH-50 Ball Head

LEE FILTER HOLDER

100mm filter holder system

LEE POLARISER

100mm polariser filter for LEE 100mm filter holders system

LEE GRADUATED FILTER

ND.9 (3-stop) neutral density soft graduated filter

 
ATCHU WAY

Kuto, Isle of Pines

I got this shot only a few minutes after my last shot. Not quite satisfied with the scene, I switched my attention to these pine trees and thought it would make a nice image with the stars above it. Little did I know I’d capture part of the Milky Way.

As mentioned in my last post, I was hoping to capture the Milky Way over Adventure Island from Atchu Camping. The centre of the Milky Way was too close to the fairly bright horizon to be seen. The sun rises from the same direction and the two hour window before hand wasn’t enough to capture it over the island. Turning my attention about forty degrees to the right, I was able to capture a part of it higher in the sky. To my surprise, as I couldn’t see it with my eyes. Though very happy I capture the Milky Way, it wasn’t my intention on this photo. My attention was captured my the three pine trees pointing up towards the stars. To me, it made for a better composition than my previous photo. And, as with the last photo, it wasn’t taken at dawn but only ten minutes after the first shot at about 2:50 am.

If you’d like to know more on Atchu Camping, check out my blog post To Atchu Beach.

Editing took a little longer on this image. Trying to bring out the Milky Way as much as possible without over doing it, was difficult. A Graduated Filter loaded with Clarity and Dehaze can do wonders but dodging and burning with the Adjustment Brush helped too. The rest of the image was fairly straight forward in regards to editing.


SONY a7 III

full-frame mirrorless camera (body only)

TAMRON E 28-75mm ƒ/2.8 Di IIIRXD

standard zoom, e-mount lens

VANGUARD TRIPOD

VEO 235AB Tripod with TBH-50 Ball Head

L-BRACKET

quick release Arca-Swiss L-plate for Sony Alpha series cameras

SANDICK EXTREME PRO CARD

128GB SDXC memory card

HEADLAMP

Letmy headlamp with white and red Light

 
STARRY ATCHU

Kuto, Isle of Pines

Though cyclone Uesi was north of New Caledonia, it’s effect on Isle of Pines was minimal with some grey clouds and occasional drizzle in the night. An image I was hoping to capture was the Milky Way over Adventure Island. I got one clear night out of the four we were there. This shot was taken on our last night in Isle of Pines.

If you haven’t read my last post, my friend, her two kids and I spent four nights, five days in Isle of Pines at Atchu Camping. The campsite has kind of a private beach and that is where I took this photo from. I was pretty lucky to capture this image as it was our last night on the island. The first night I got up it was clear but clouds came rolling in at such speed, it was amazing to watch. It covered up very quickly and I couldn’t see the Milky Way to begin with. The second night was overcast and the third night it rained. I didn’t give up thought, as there was one more night.

I used the PhotoPills app to see where the Milky Way was going to appear. The app showed it above the horizon at 2:30 am, just over Adventure Island (the island to the left of the image). Unfortunately, with dawn only a couple of hours away and the sun rising from the same direction, it was too bright, not only me to see it but, for the camera to capture it, as well. This eight second exposure was taken at 2:40 am and as you can see, it looks almost day time. I did miscalculate one thing though, the angle at which the Milky Way would appear. I thought it was vertically above the island but in fact, it was at a 35º angle to the right. I should have studied the app thoroughly. Great app though and highly recommend it, PhotoPills.

My first exposures of the Milky Way were framed more to the right with Adventure Island in the middle of the image. Once I realised I wouldn’t capture the Milky Way, I reframed my shot to still include the kayak in the foreground but to add the branches as a natural frame to the stars. I tried different exposure times to see how long I could go before the stars started streaking. Eight seconds seemed to be perfect for this scene. Now I was only two meters from the kayaks which is why they’re out of focus. I should’ve taken another exposure with the focus on them and blended the two images to get sharpness throughout the image. I can’t tell you why I didn’t do it, I can’t only tell you I should have. Editing was fairly quick. Once I got the White Balance right, I pulled up the Shadows to see more of the kayaks and the land mass to the left. Then I added an Graduated Filter to the foreground with a bit of Whites to accentuate the highlight a little. Another Graduated Filter was added to the sky with Clarity and a little Dehaze, just to make those stars pop more. A couple of Radial Filters were added to lighten the water and the other as a vignette. Last bit of edit was with the Adjustment Brush to add Highlight and Whites to a few stars, just to make them shine a little more. Overall, I like the image even though it’s not the most eye catching.

There’s another photo though that I find much more interesting but that’s for a different post.


SONY a7 III

full-frame mirrorless camera (body only)

TAMRON E 28-75mm ƒ/2.8 Di III RXD

standard zoom, E-mount lens

VANGUARD TRIPOD

VEO 235AB Tripod with TBH-50 Ball Head

L-BRACKET

Quick Release Arca-Swiss L-plate for Sony Alpha Series Cameras

SANDISK EXTREME PRO CARD

128GB SDXC memory card

HEADLAMP

Letmy Headlamp with White and Red Light

 
TO ATCHU BEACH

Kuto, Isle of Pines

On my last post, I mentioned Atchu Camping but didn’t elaborate on it. This is where we pitched our tents for four nights in Isle of Pines. Sleeping in tents was the only camping activity we did though, for our stay here was a lot more comfortable.

Atchu Camping is situated on the other side of the eastern point of Kanumera Bay. And at the end of the dirt road that’s to the left of the Ouré Lodge reception. The easiest way to get there is by shuttle bus which you can book online at the same time as your camping. Note though, that the shuttle drops you off at Ouré Lodge reception and you’ll have to walk the rest of the way to the campsite. It’s a five to ten minute walk so don’t bring too many or heavy things. You’ll have to walk back to the reception when leaving too. Road’s a little bumpy for a small car but you can drive right to the campsite if you hire one. Now don’t be fooled by the name, Atchu Camping is much more yet stays modest. There’s a family hut and a few bungalows if you prefer a little more comfort than a tent. There’s a small snack/restaurant, Chez Didas, that serves breakfast, lunch and dinner. Breakfast is simple with bread, butter, jam, fruit, juice and tea/coffee. Lunch is more on the snacks side of things with burger, panini, sandwich and dinner is a small menu of five or six dishes. We tried all three and can highly recommend eating Chez Didas. Reserve in advance though. They do have an outdoor kitchen with, just about, everything you need to cook. It’s a another way to save money and meet people. And talking about meeting people, if you’re someone who’s constantly connected to social networks, don’t worry, free WiFi is available throughout the campsite, except when eating. That’s right, they turn off the WiFi at breakfast, lunch and dinner times and I’m guessing it’s to promote their own social network between their customers. I think it’s a great idea. We ended up meeting and conversing with people at breakfast and dinner, and had a great time. They also have a couple of outdoor sheltered seating areas with electrical power strips to recharge your batteries or whatever. What more can you ask for? Toilets? Showers? Yes, they have those too but bring your own toilet paper and soap. Atchu Camping is constantly windy, which is great for those hot and humid summer days and nights. The campsite is clean and quiet, perfect for those looking to get away and relax. And it’s only a fifteen to twenty minute walk to Kanumera Beach.

We had our tents pitched about ten meters to the left of this photo. I was waiting for my friend and her two kids, to head to breakfast, when I took this shot. It just seemed like a nice scene. Sun, sand, palm trees, turquoise water… it was a beautiful morning. The shot was taken with a polariser filter to remove glare from the water and accentuate the colours. I over-exposed slightly to what the metering gave me and glad I did because I got more details out of the shadows. Editing was very basic apart from an orange/red cast on the wood fence and ground which reduced with the red saturation slider under Calibration (Lightroom). I played around with the other two sliders, the green and blue saturations, to make the colours pop a little. I tell you, the Calibration sliders can do wonders to an image.

Well that’s it for now, the next image is a night shot, I think, from this little beach. Cheers.


SONY a7 III

full-frame mirrorless camera (body only)

TAMRON E 28-75mm ƒ/2.8 Di III

standard zoom, E-mount lens for Sony cameras

LEE FILTER HOLDER

100 mm filter holder

LEE ADAPTER RING

67mm thread adapter ring for LEE 100mm filter holder

LEE POLARISER FILTER

100mm circular polariser filter for LEE 100mm filter holder

SANDISK EXTREME PRO CARD

128GB SDXC memory card

 
THE BREAKTHROUGH OF DAWN

La Roche Percée, Bourail

This time last year I was at La Roche Percée with a friend who was minding a house just beyond those trees on the far side of the beach. I took advantage of the opportunity to try out the Sony a7 III with the Tamron E 28-75 mm ƒ/2.8 Di III RXD standard zoom lens, that I had bought the month before. No dramatic nor spectacular sunrise that morning but, nonetheless, came away with this tranquil black & white image.

To get to La Roche Percée, you need to go to Bourail first, which is about two hours drive from Noumea, on the west coast. From there you head west by making a left turn onto a road situated just after the bridge (at the entrance of Bourail village) and opposite the Hotel La Nera. Then just follow the road till you see a sign for La Roche Percée and the Bonhomme de Bourail. There’s also a sign at the bridge for the turn off. The Bonhomme de Bourail is a landmark in New Caledonia and so is the beach but also the, actual, pierced rock. A cliff side situated next to the landmark with a, well, whole in it. At low tide you can walk through to Turtle Bay on the other side. The far end of La Roche Percée is popular with surfers and boogie boarders. It’s one of the rare beaches in New Caledonia to have waves. Another reason for me being here, apart the one mentioned above, was the hope to see, at least, one turtle lay her eggs on the beach. It was the time of season and the peninsular is THE place for this event. Up to three hundred turtles have been recorded to nest here in one season. Just amazing. Apart from seeing a few nests around, I didn’t see any turtles at all. My friend and her kids, on the other hand, saw baby turtles race to the water. So lucky. Yes, I’m jealous.

Because it had been raining on and off for the last few days, I had hopes for a dramatic sunrise. Of course, it was nothing of the like. Apart from a few clouds rolling in from the east, it was clear skies everywhere else but I took a few photos nonetheless. For this image I used the Lee Little Stopper (a 6-stop Neutral Density filter) to get a long exposure and a Lee ND.9 Soft Grad. (a 3-stop Neutral Density soft gradient filter) to tone down the bright sky. I don’t have a lot of filters and this was probably my second time using them. I had to try them out and get used to them if I want to take full advantage of it. I was pretty happy with the results. I didn’t do a lot of editing, just adjusted my White Balance before converting to black & white then I just dropped the Highlights and brought out the Shadows. Brushed a bit of Texture over the rocks in the foreground to make them stand out more and a Radial Filter with a bit of Exposure to lighten up just a touch the bottom two thirds of the image. That’s it.

The black & white conversion made for stronger and prominent features. In colour, the image was bland and not very pretty. The conversion also seem to make the image more peaceful, isolated, minimalist. There’s nothing great about this shot but there’s something about it that makes me like it.


SONY A7 III

24MP Full-Frame Mirrorless Camera (Body Only)

TAMRON 28-75MM Ƒ2.8

Sony E-Mount Lens

LEE LITTLE STOPPER

6-Stop Neutral Density Filter

LEE FIRECREST ND.9 SOFT GRAD

3-Stop Neutral Density Soft Gradient Filter


HAPPY HOLIDAYS

Place de la Marne, Noumea

I hope everyone’s had a fantabulous Christmas. Wishing you all a safe and memorable holiday season. May the joy and happiness continue through to the new year.

This is  another photo taken at La Place De La Marne. I prefer the Christmas tree in this photo than in my last post. Maybe because it seems more traditional in green. Another long exposure, 5 seconds this time at an aperture of ƒ/11 and ISO 100. A vertical shot which I like quite a bit. I left out all the distractions and captured just the tree and it’s illuminations. I got this shot at the very end of blue hour and was lucky no one was in front of me. Post-processing was very basic too. Nothing fancy, brought up the Shadows, dimmed the Highlights slightly, a bit of Texture and Clarity, a slight Camera Calibration and that’s it. Quick and easy. Very glad everything was captured in-camera.

Take care over the holidays everyone. Have fun but be careful on the road and, please, don’t drink and drive.

JOYEUX NOËL

MERRY CHRISTMAS

A quick photo sharing before Christmas Eve dinner. I took this shot last night at La Place Des Cocotiers, where the City of Noumea has it’s Christmas illuminations. I have to say, they’ve done a magnificent job this year. I went with my friend and her two girls, and they were so excited and happy. You could feel the magic of Christmas, it was wonderful.

Now for those interested, this photo was taken at blue hour with a long shutter speed of 3.2 seconds. Everything is sharp at ƒ/11 except the crowd but that’s expected with shutter speed used. ISO 100 to keep things clean. Not one of my favourites, something is bothering me in this image and I don’t know what it is. The edit was pretty quick, nothing fancy. But all that doesn’t matter.

What matters is I wish every single one of you a very Merry Christmas. Whether you called it that or something else, whether you celebrate it or not, it doesn’t matter either, my wish to you is a merry one. And whether you spend it with your family, friends or strangers, I hope this moment together fills you, and them, with joy and happiness. And don’t forget the little ones, for this time of the year is magical so help them dream and be in awe. Let’s all be merry.

MERRY CHRISTMAS | HAPPY HOLIDAYS

LA NUIT DES ILLUMINÉS DU BAGNE

THE NIGHT OF THE ILLUMINATED JAIL

Noumea, New Caledonia

This event was organised by Association Témoignage d'Un Passé, hosted by them and Site historique de l'île Nou, and held at the Centre de Rencontres et d’Échanges Internationaux du Pacifique (CREIPAC) in Nouville. An evening of music, lights, dance and comedy gave vibrance to this heritage site.

My objective for the evening was to capture the lights on these century old buildings. My mistake though was not arriving before blue hour. It would’ve bumped a couple of these photos a notch above average.

Historically, this place was a hard labour prison and is now a place where people from all over the world come to learn French. And I’m sure to discover the culture here and it’s people.

FINGERS MITCHELL CULLEN

REPLAY-ing Live en Août

Noumea, New Caledonia

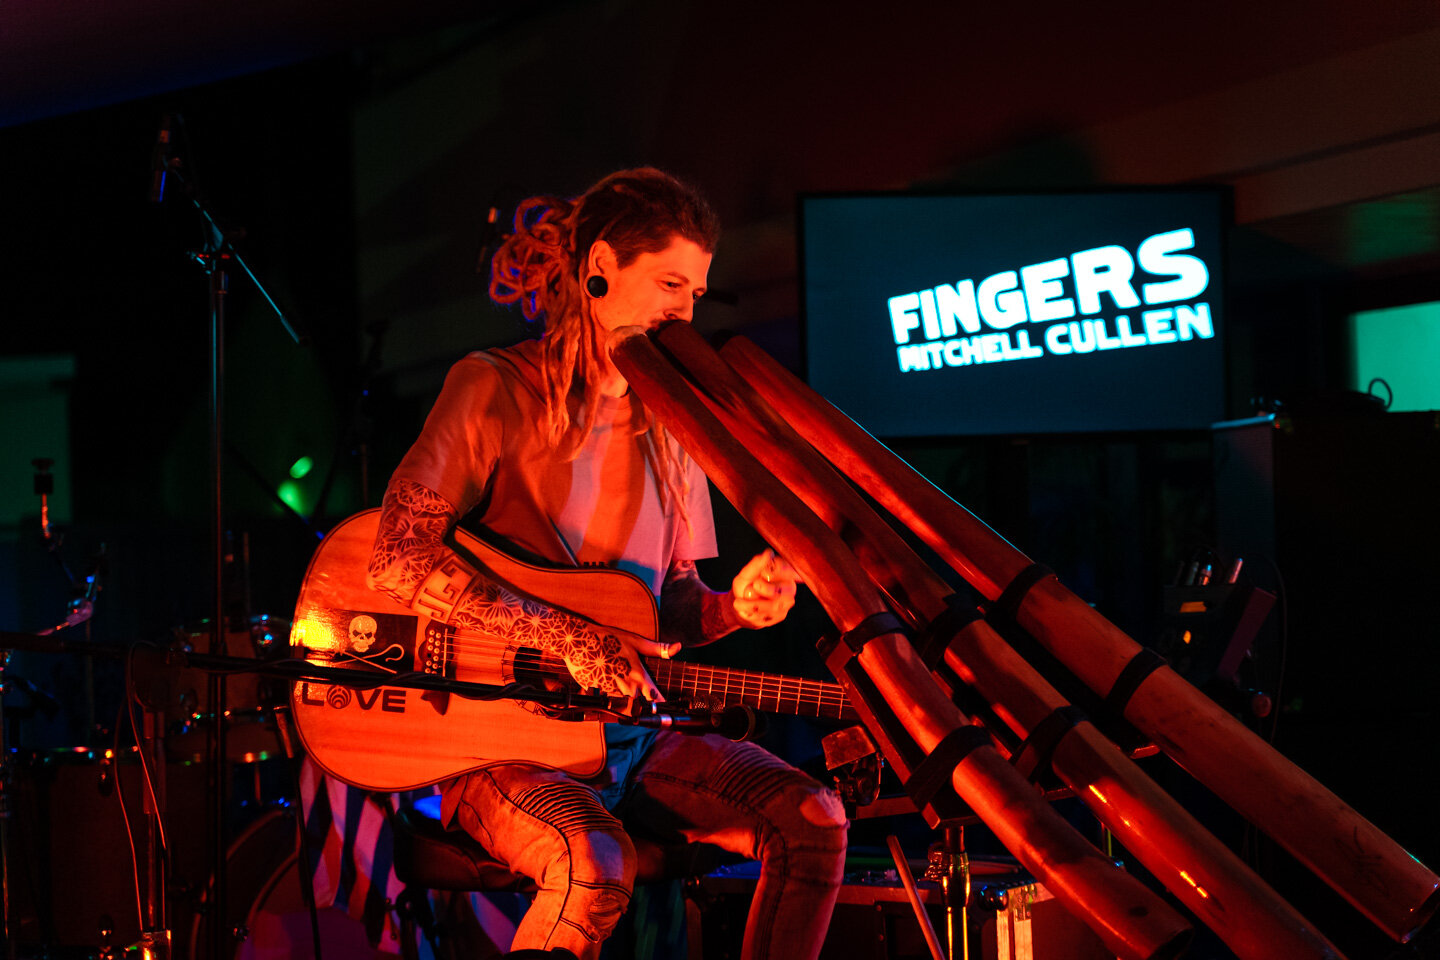
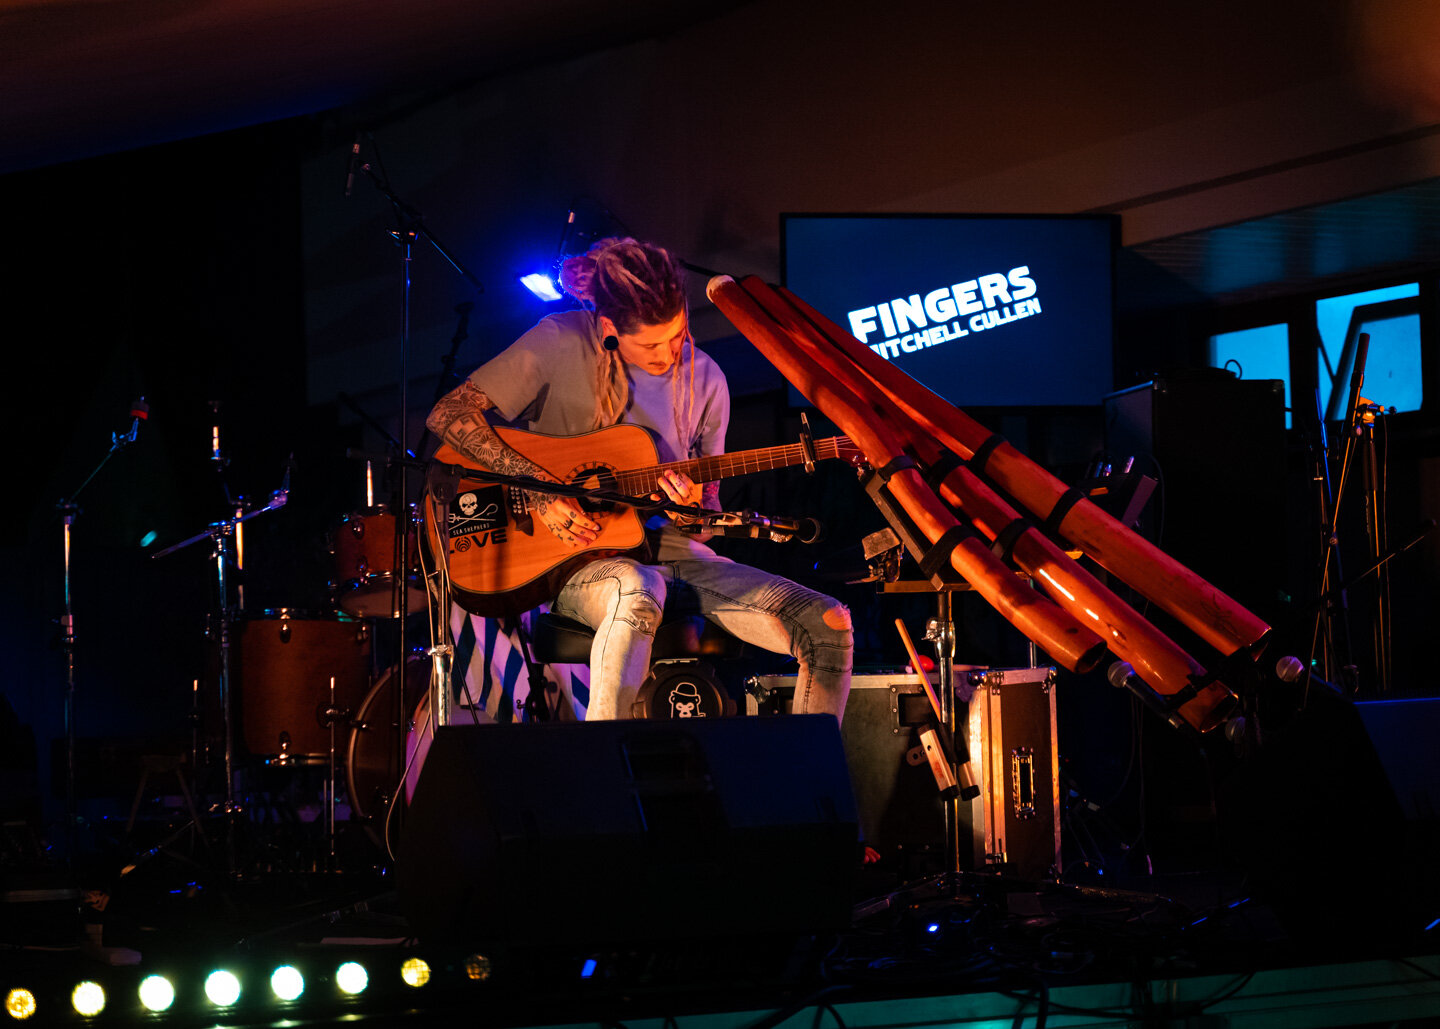
The last, but not the least, performer I went to hear and see at the Live en Août music festival was FINGERS Mitchell Cullen at the Code Bar. A very talented multi-instrumentalist performing as a one-man-band. A remarkable young man who, not only, sings but writes his own songs as well. He has a unique style that is also present when doing cover songs. Head over to his website to hear his music.

As with the previous bands, I used a shutter speed of 1/320th second with a wide open aperture of ƒ/2.8 and used the ISO to correct the exposure. I would’ve liked to have gotten closer to get those detail shots but didn’t have a long enough zoom lens.

Again, I’d like to give a little shoutout to REPLAY for the great work they did with lights and, especially, the sound.

THE FERGIES

REPLAY-ing Live en Août

Noumea, New Caledonia

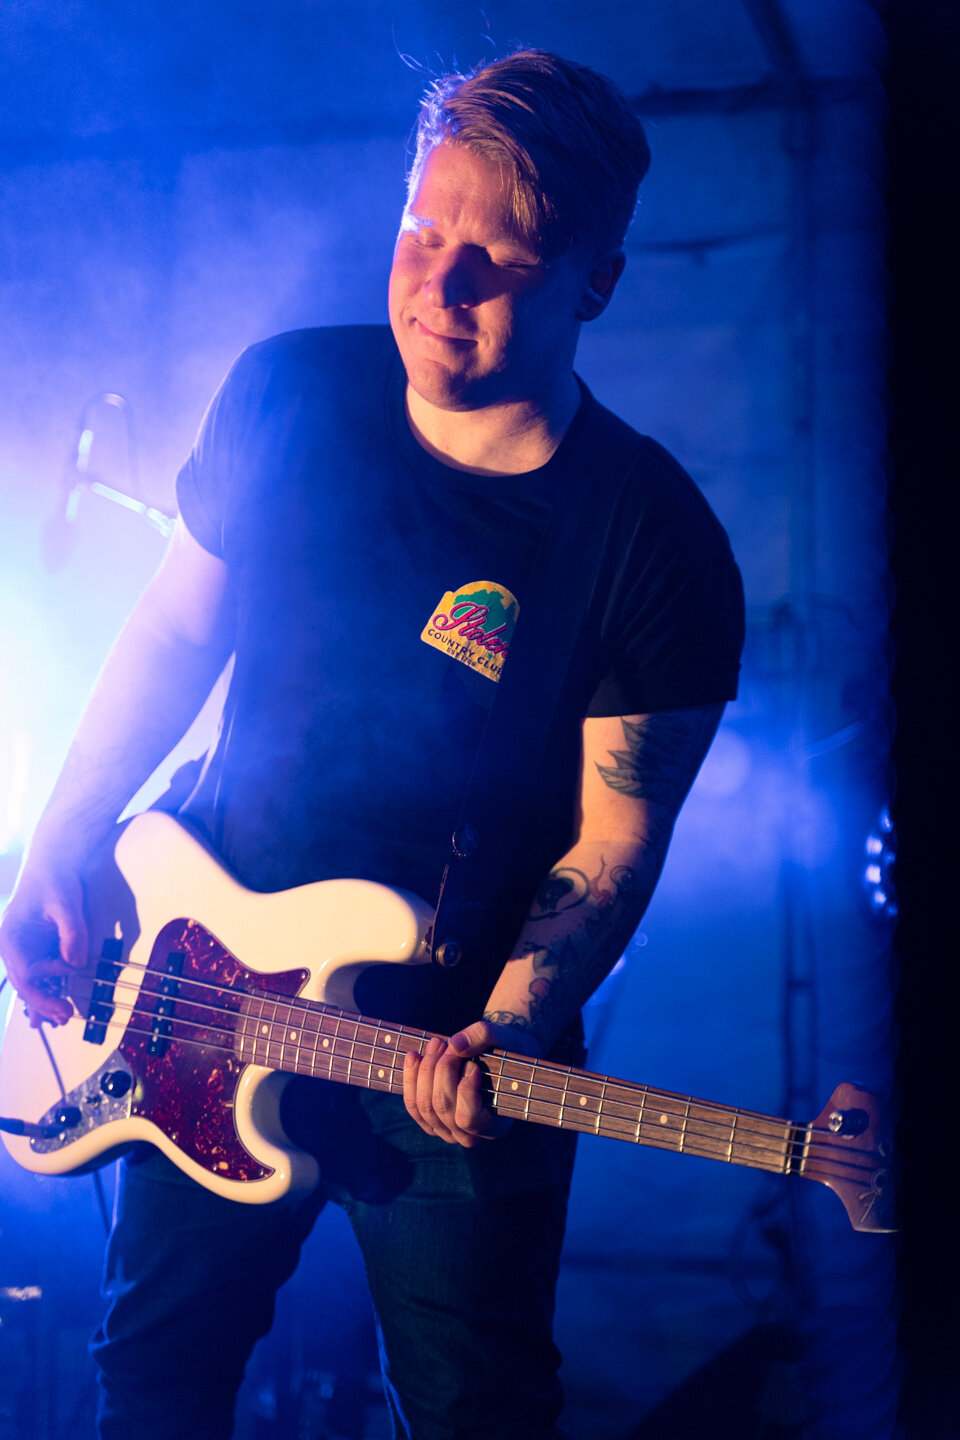
As mentioned in my last post, the music festival Live en Août had great Australian performers this year. The Fergies is one of those groups. A folk/indie/rock/pop band from Brisbane. They performed at La Barca and were very entertaining to watch and listen.

Once again, REPLAY did an amazing job with light and sound in such a small venue. I wasn’t going to photograph The Fergies but with the band so hyped and the light show from REPLAY… I couldn’t resist taking a few photos. I’m glad I always carry my camera with me. They all knocked it out of the park. My photos don’t do them justice.

I used the same settings as with The Montreals concert, 1/320th second exposure time with a wide open aperture of ƒ/2.8 and just played around with the ISO to get a proper exposure. I think 1/400th or 1/500th second might have been a better choice, otherwise I’m pretty happy with these photos.

THE MONTREALS

REPLAY-ing Live en Août

Noumea, New Caledonia

Every year in August we have a music festival called Live en Août with local and international artists performing at different venues. This year, the international artists were all Australians. Two bands and a one-man-band.

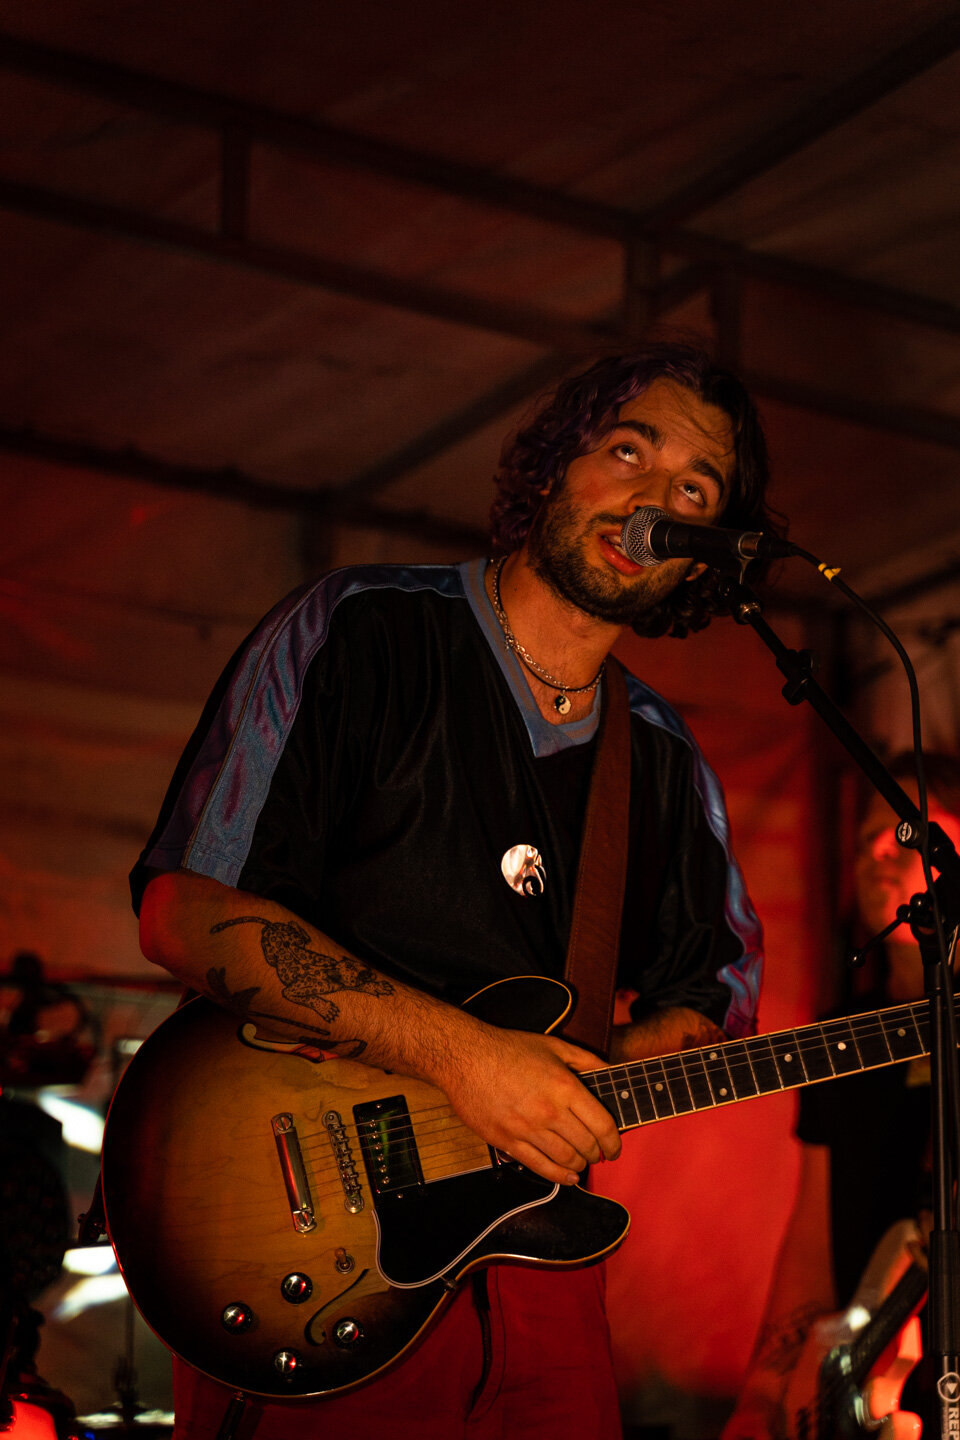
The Montreals were the first band I went to see at Le Bout du Monde, a bar/restaurant situated on Port Moselle Marina. The Montreals are an Indie/Rock band and, to my liking, have a bit of R&B and disco sounds in some of their songs. Not only entertaining, they also interact with the crowd, especially between songs where the lead singer is quite funny. I really liked this group and would love to see them again.

I’d like to give a shoutout to REPLAY, especially a friend of mine Alain. They’re the team behind the sound and light (they also do video) of the festival. We rarely, if ever, think about it but light and sound is critical. I won’t go in-depth here with the why or how of it all. Since my mate Alain started working in the industry, I’ve had the opportunity to checkout some of the behind-the-scene stuff and, I have to say, these guys work hard to get things right and entertain us.

In regards to photographing this group, after some trial and error, I set my shutter speed to 1/320th second which was enough to freeze the action. They weren’t jumping around frantically so it was perfect. Aperture at ƒ/2.8 for a shallow depth of field then it was just a matter of adjusting the ISO to get a good exposure. My focus wasn’t always on the mark but I’m very happy with these photos.

The Australian music scene is insane. Fantastic and original groups and solo artists from all walks of life, rise up above it all and are able to sustain themselves in this industry. The Montreals are no exception.